On the Azure Machine Learning page, the steps are similar to when we created a labeling project for image data labeling in the previous section but with a few exceptions, such as the Labeling task type step.
Click on Add project on the Data Labeling page:
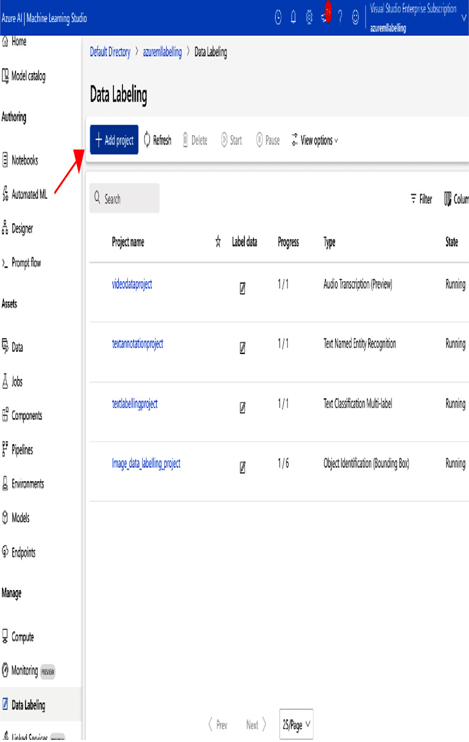
Figure 12.21 – Add project
Enter the project name for the text data labeling project, select Text for Media type, and select the labeling task type as shown in the following screenshot:
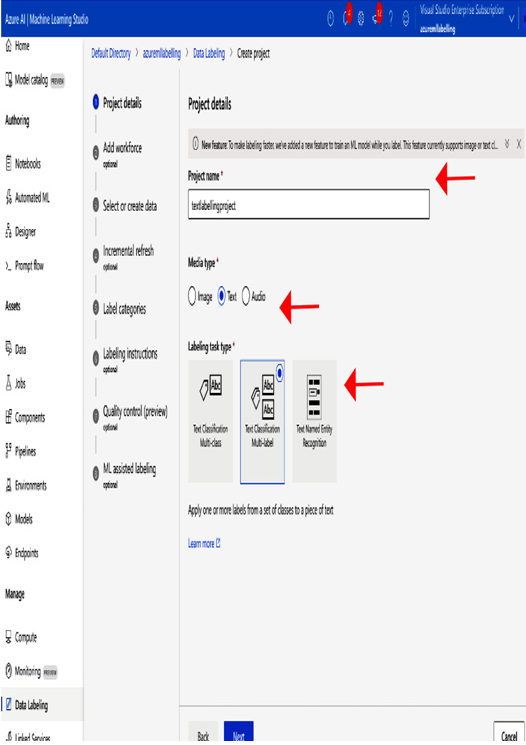
Figure 12.22 – Project details
Step 2 – Create data asset
As we saw in the previous section for the image data labeling project, we can create a data asset with two options: either from Azure Blob storage or from local files.
After selecting the data asset, click on Next. The next step, Incremental refresh, is optional. This is required if we want to automatically refresh new data in the labeling project. For this example, skip this optional step and click Next.
Then, you will land on the following Label categories screen.
Step 3 – Select the label category
On the Label categories page, add the label categories that you want to use for labeling your text data.
For this exercise, add the animal, person, and location label categories to label the text documents.
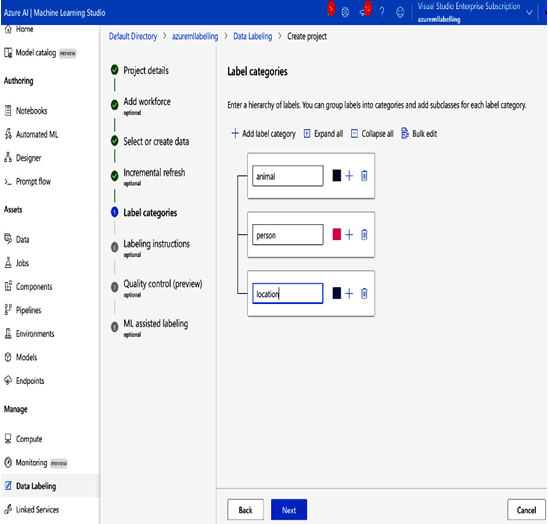
Figure 12.23 – Adding label categories
Click on Next, skip the optional steps as discussed in the previous section, and create the labeling project for text data.
You have now created the textannotationproject project and can see it on the Data Labeling page, as shown in the following screenshot:
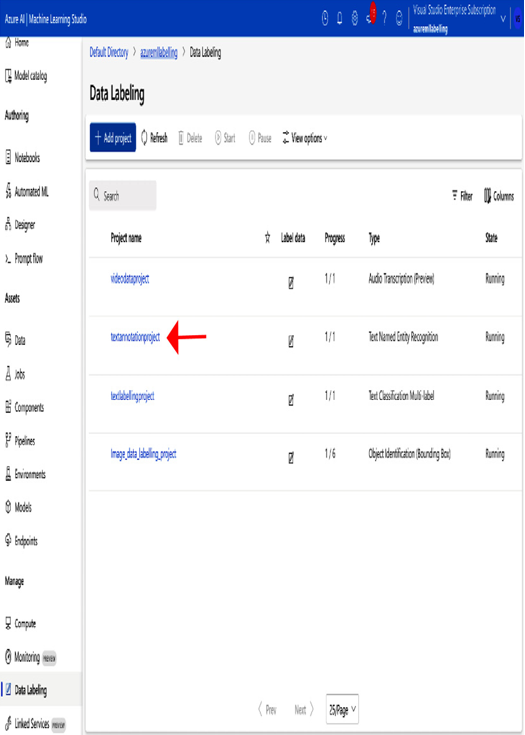
Figure 12.24 – The textannotationproject project
Step 5 – Label the text data
Now, click on the project name. On the following page, click on the Label data option under textannotationproject:
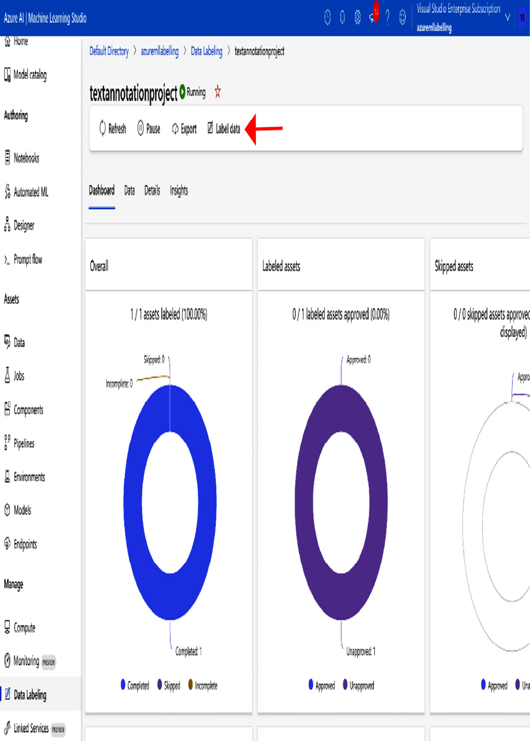
Figure 12.25 – Dashboard – Label data option
Finally, you can annotate your text data here:
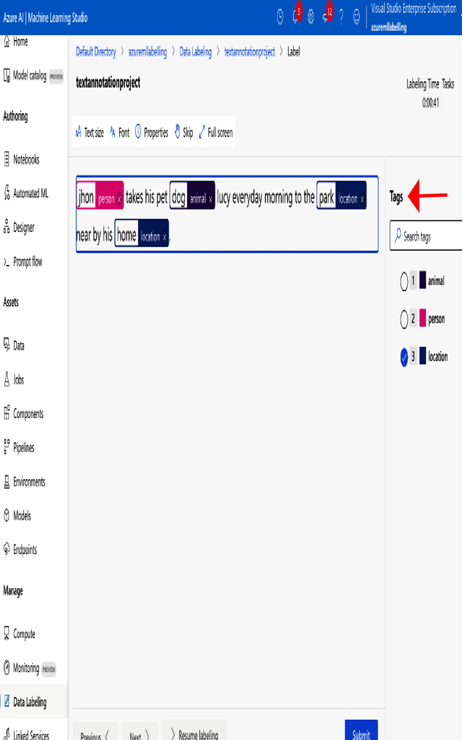
Figure 12.26 – Annotating the text data
We have seen how to create a project for text data labeling and then label the text documents in Azure Machine Learning. Now, let’s see how to label audio data in Azure Machine Learning.
