Go to Settings | Labeling Interface. Here, you can select a template from the available templates in Label Studio as shown in the project. Select Image Classification.
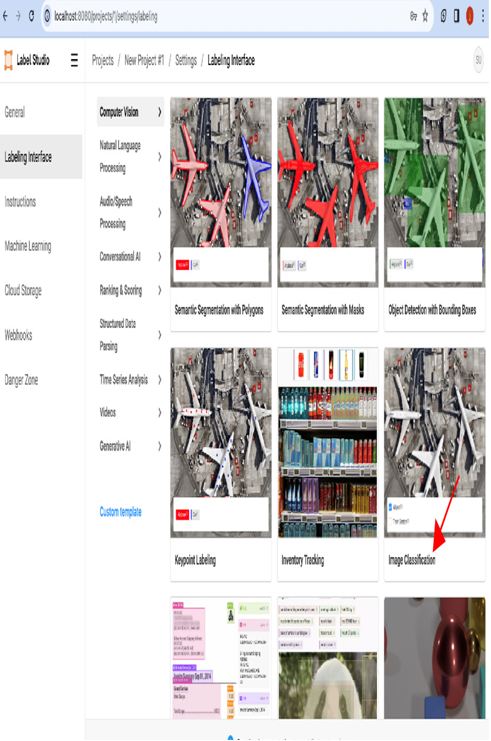
Figure 12.32 – Selecting the template
Once you have selected the label template, you need to set up the label names bicycle and person:
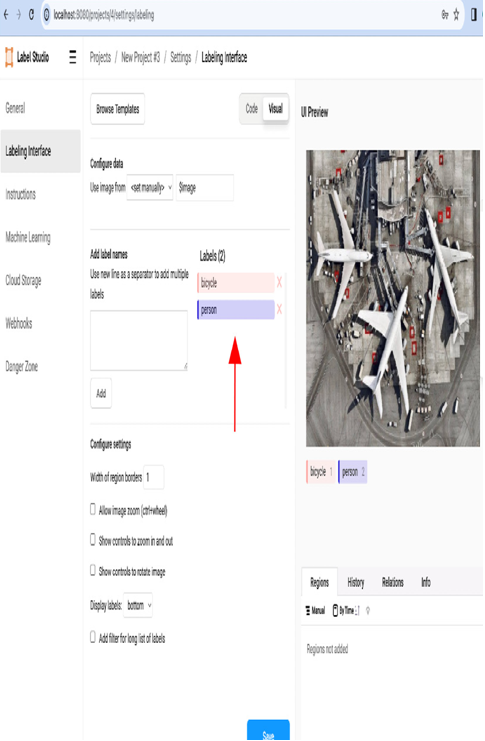
Figure 12.33 – Adding label names
Applying labels in Label Studio
Finally, go to Labeling and apply the labels to the images. As per the selected template (Image Classification), select the label and then draw the bounding box on that object in the image:
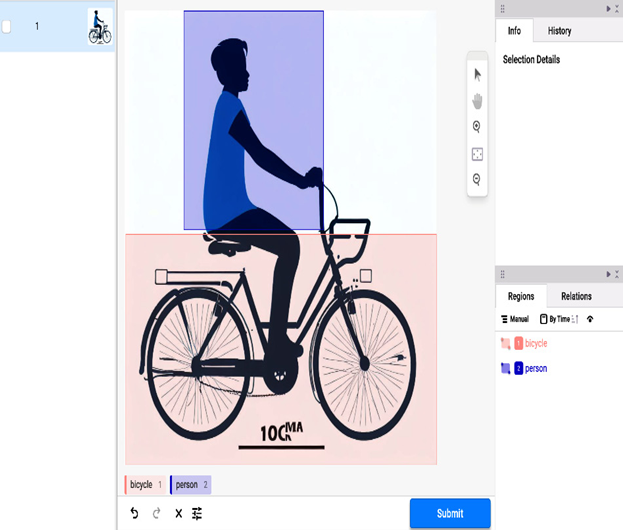
Figure 12.34 – Applying labels in Label Studio
You can label the next image in a similar fashion.
We have now seen how to create a project, select a template, and label the images in Label Studio. Now, let’s see how to label text data in Label Studio.
Labeling the text data
In this section, let’s see how to label text data using Label Studio.
For text data labeling, there are various natural language templates available in Label Studio, such as text classification templates and named entity recognition templates to identify the entity (person, organization, etc.) in the given sentence.
We will follow the same steps that we used for labeling image data in Label Studio. First, we create a project, then we import the data and select an appropriate label template. We have added the labels Title and person manually for this exercise. Finally, we apply the labels to the text. We have applied the labels Title and person to the entities in the sentence “This is vijay text annotation” for this example.
For more detailed documentation, go to https://labelstud.io/.
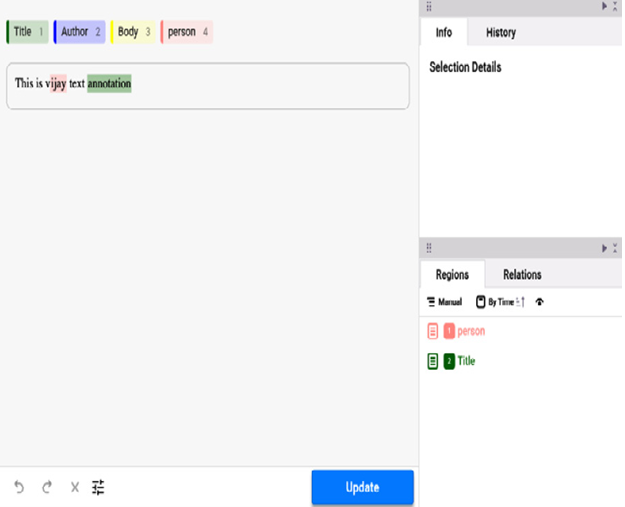
Figure 12.35 – Text annotation
We have now seen how to annotate the sample text using labels in Label Studio. Similarly, we can label the next piece of text data that we uploaded using Label Studio.
