Generate a data asset using an Azure datastore. While local file uploads are common, Azure Storage Explorer offers a more efficient method for transferring large data assets. It is recommended as the default tool for file movement.
For the data source, select From Azure storage to upload files from Azure Blob storage and create the data asset.
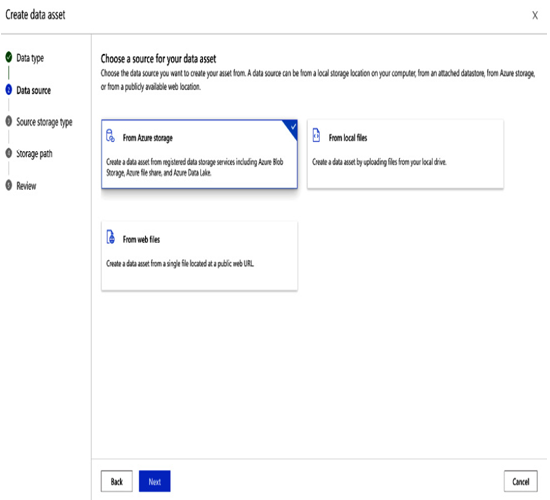
Figure 12.9 – Creating a data asset from Azure Blob storage
Option 2 – Create a data asset from files on your local system
You can upload files from your local system and create a data asset, as shown in the following screenshot:
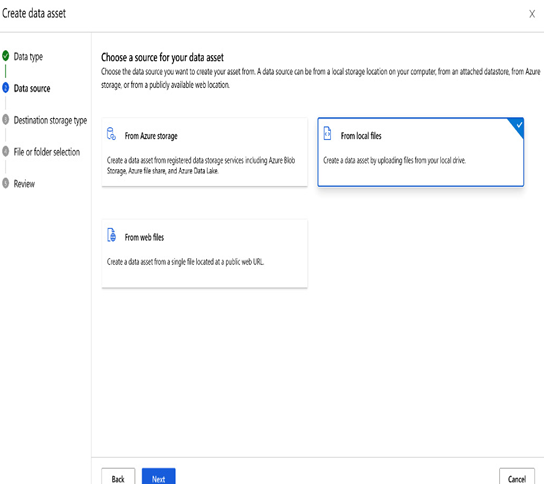
Figure 12.10 – Creating a data asset from local files
For this example, I have uploaded data from the local filesystem as the data asset size is small and available on the local system.
Step 4 – Label image data
Now, select the bike_riding_man data asset that we created in the previous step:
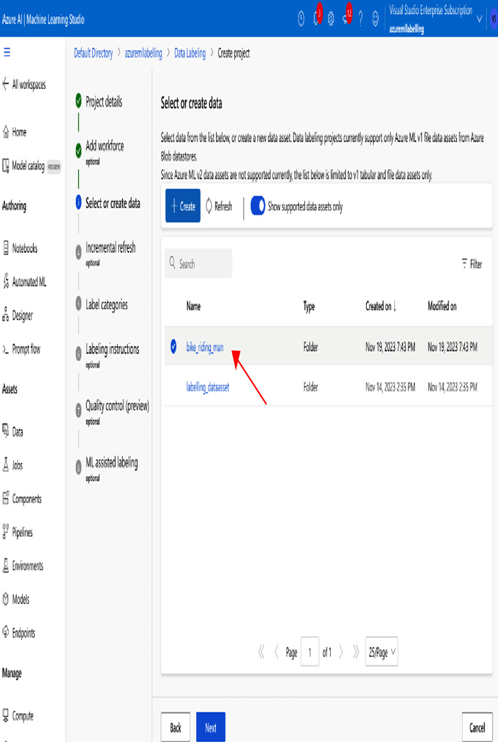
Figure 12.11 – Selecting the data asset
After selecting the data asset, click on Next. The Incremental refresh step is optional. This is required if we want to automatically refresh new data in the labeling project. For this example, let us skip this optional step and click Next again.
You will land on the following Label categories screen. Let’s add the label categories Bike and person for this example.
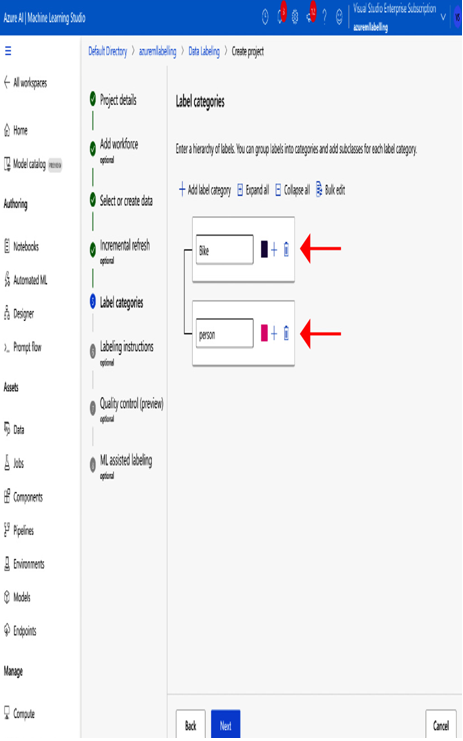
Figure 12.12 – Adding label categories
After adding the categories, click on Next. You will land on the Labeling instructions page. Let’s skip this optional step and click on Next again. You will now be on the Quality control (preview) page. This is currently in preview. It is used to send labels to multiple labelers to get more accurate labels. Skip this by clicking on Next. You will now be on the ML assisted labeling page.
This step is optional. If you want to train a model to pre-label the data, then you can use this, but beware that it incurs additional compute costs.
If ML assisted labeling is enabled, after manually labeling the configured number of items, then the ML model will automatically label the rest of the items and provide suggestions for human review.
The threshold for the number of manually labeled items to commence ML assisted labeling isn’t fixed and can significantly vary between labeling projects. In some instances, pre-labeling or cluster tasks may appear after manually labeling around 300 items. This threshold depends on how similar your dataset is to the dataset that the ML model was already trained on.
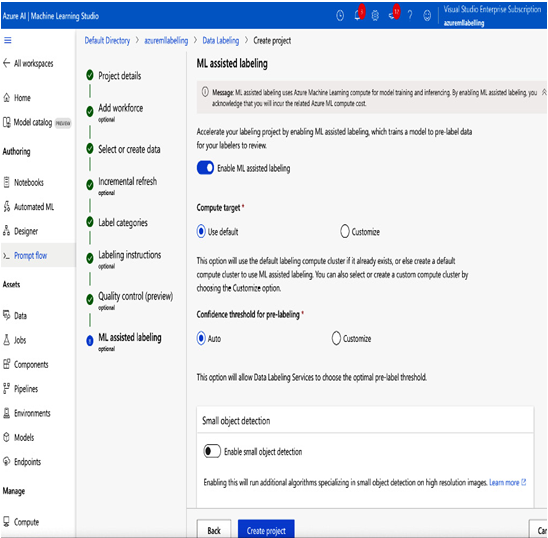
Figure 12.13 – ML assisted labeling
Finally, click on Create project on the ML assisted labeling page. Our labeling project, Image_data_labeling_project, has been created on the Data labeling page.
Click on the project, and it will open the next screen. Click on Label data to start labeling the data that you uploaded:
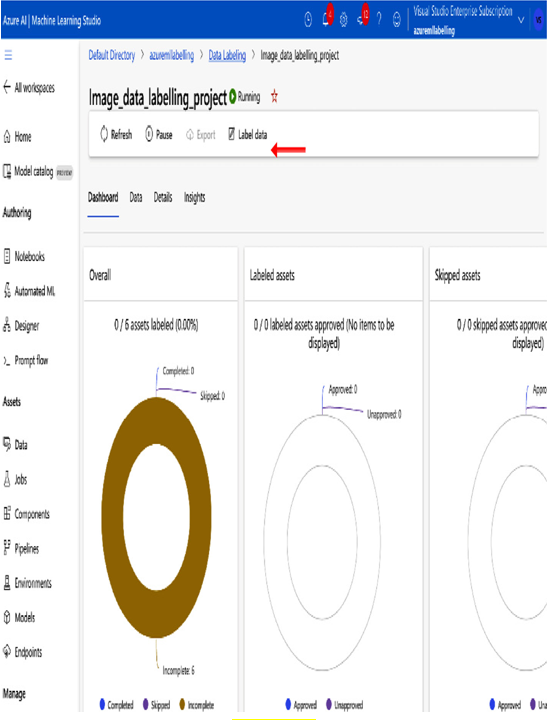
Figure 12.14 – Label data
When you click on Label data, it will show the images that you uploaded, and you can now start labeling those images.